Dynamic Content and Templates
Dynamic content makes one page read differently for every learner. Variables fill in values like the learner’s name or progress, conditional blocks show content only to the learners who match your rules, and community tags bring a community’s discussions into the lesson. Templates let you save blocks or whole pages and reuse them across courses.
Variables, conditional blocks and community tags are in the Personalize menu of the editor toolbar (the braces icon). Everything, templates included, is also in the Dynamic content group of the / menu:
| Slash command | What it inserts |
|---|---|
| Variable | A value that changes per learner. |
| Conditional content | A block only some learners see. |
| Show to a group | A conditional block for members of a user group. |
| Unlock later | A conditional block that appears 7 days after the learner enrolls. |
| A/B test | Two versions of a block, each shown to half of the learners. |
| Insert template | A saved block or page. |
| Save as template | Saves the selection or the page for reuse. |
Variables
A variable is a placeholder that each learner reads as their own value. To insert one, open Personalize and pick the variable option, or type {{ in the page. Search the list, pick a variable, and it drops in as a chip.
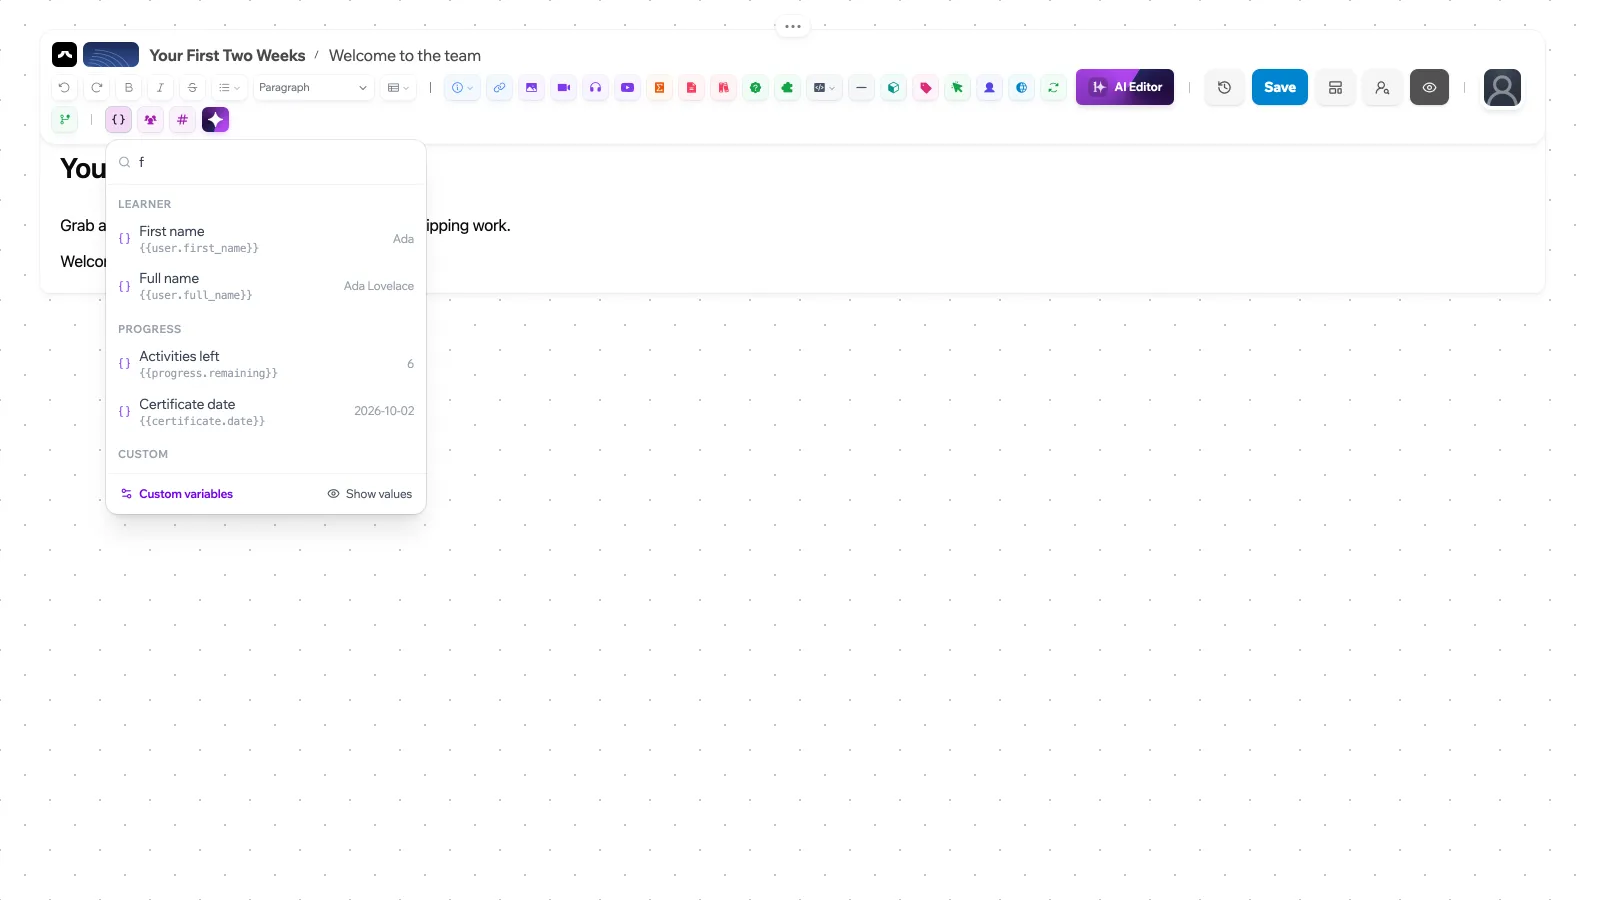
| Group | Variables |
|---|---|
| Learner | First name, Last name, Full name, Username, Email, User groups |
| Course | Organization name, Course name, Activity name, Chapter name, Next activity |
| Progress | Progress (%), Completed activities, Total activities, Activities left, Days since enrollment, Enrollment date, Certificate date, Assignments submitted, Assignments in course, Average grade, Community posts |
| Date | Today’s date, Current year |
| Custom | Values your organization defines. See below. |
Click a variable chip to set a Fallback when empty (for example “there”, so “Hi there” shows when a visitor is not signed in) and a Format (As is, UPPER, lower, Capitalize or Title Case). Use Show values in the picker to see sample values in the editor instead of variable names.
You can also write {{ user.first_name }} straight into the text. It resolves the same way, so content created through the API, an import or AI works too.
Custom variables
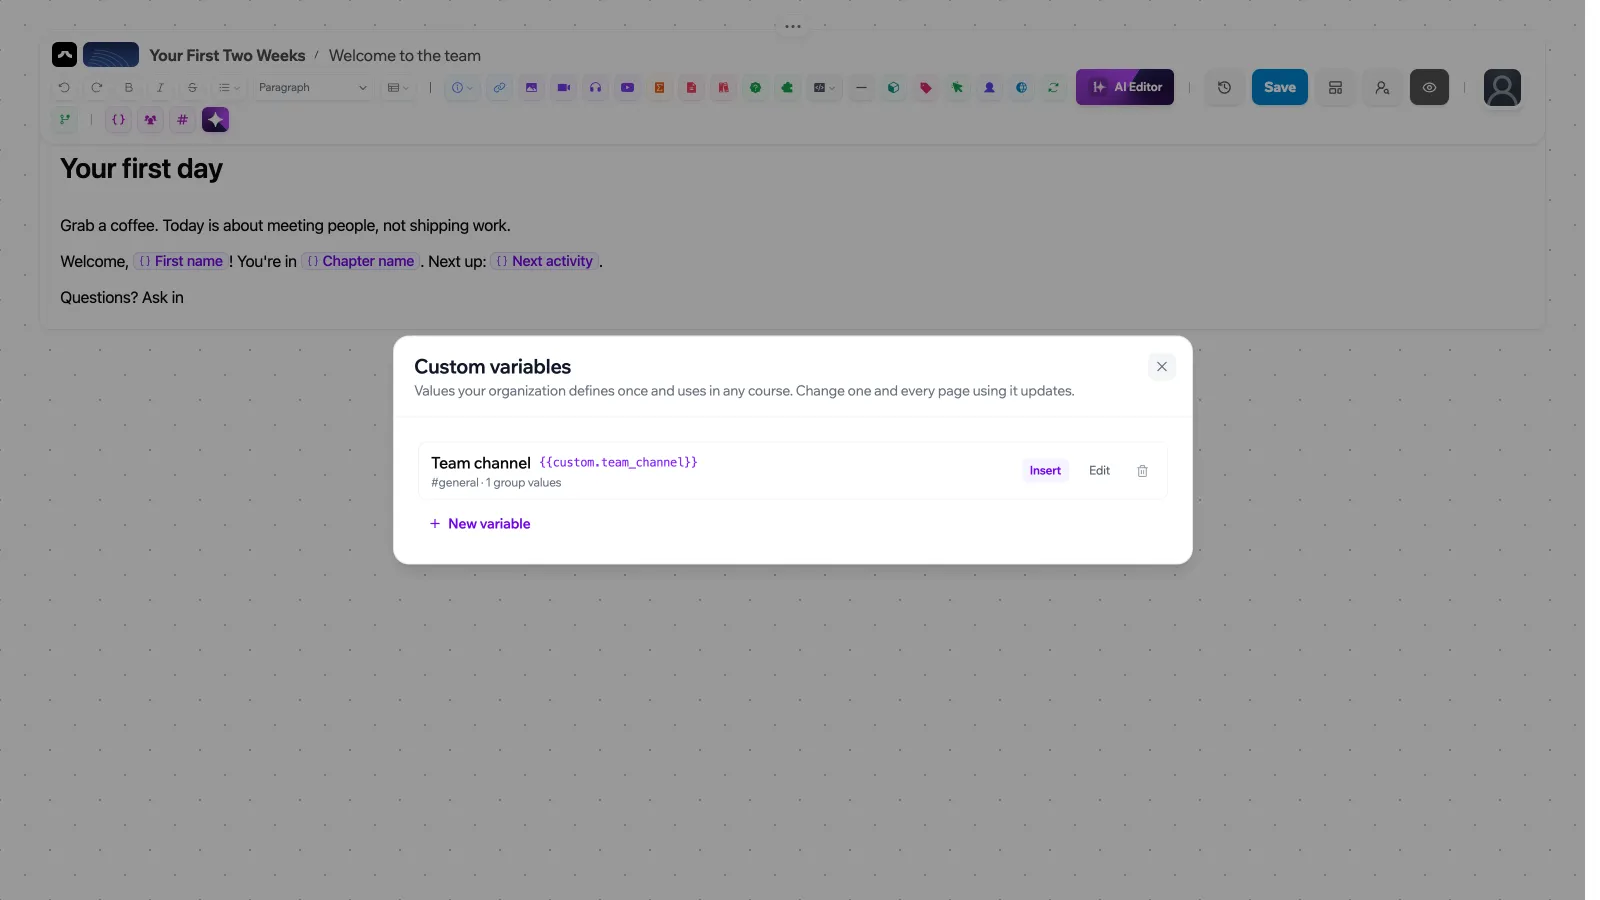
Custom variables are values you set once and use in every course: a support email, a meeting link, a manager per team. Open Personalize, choose the variable option, then click Custom variables at the bottom of the list.
- Click New variable.
- Enter a Name, a Key (lowercase letters and underscores, for example
support_email) and a Value. - Optionally, click Add a value for a user group to give the members of a group a different value. The first matching group wins.
- Save. Insert it with Insert, or as
{{ custom.support_email }}.
Change a custom variable and every page that uses it updates. Only admins and maintainers can change or delete one, because it affects every course.
Conditional content
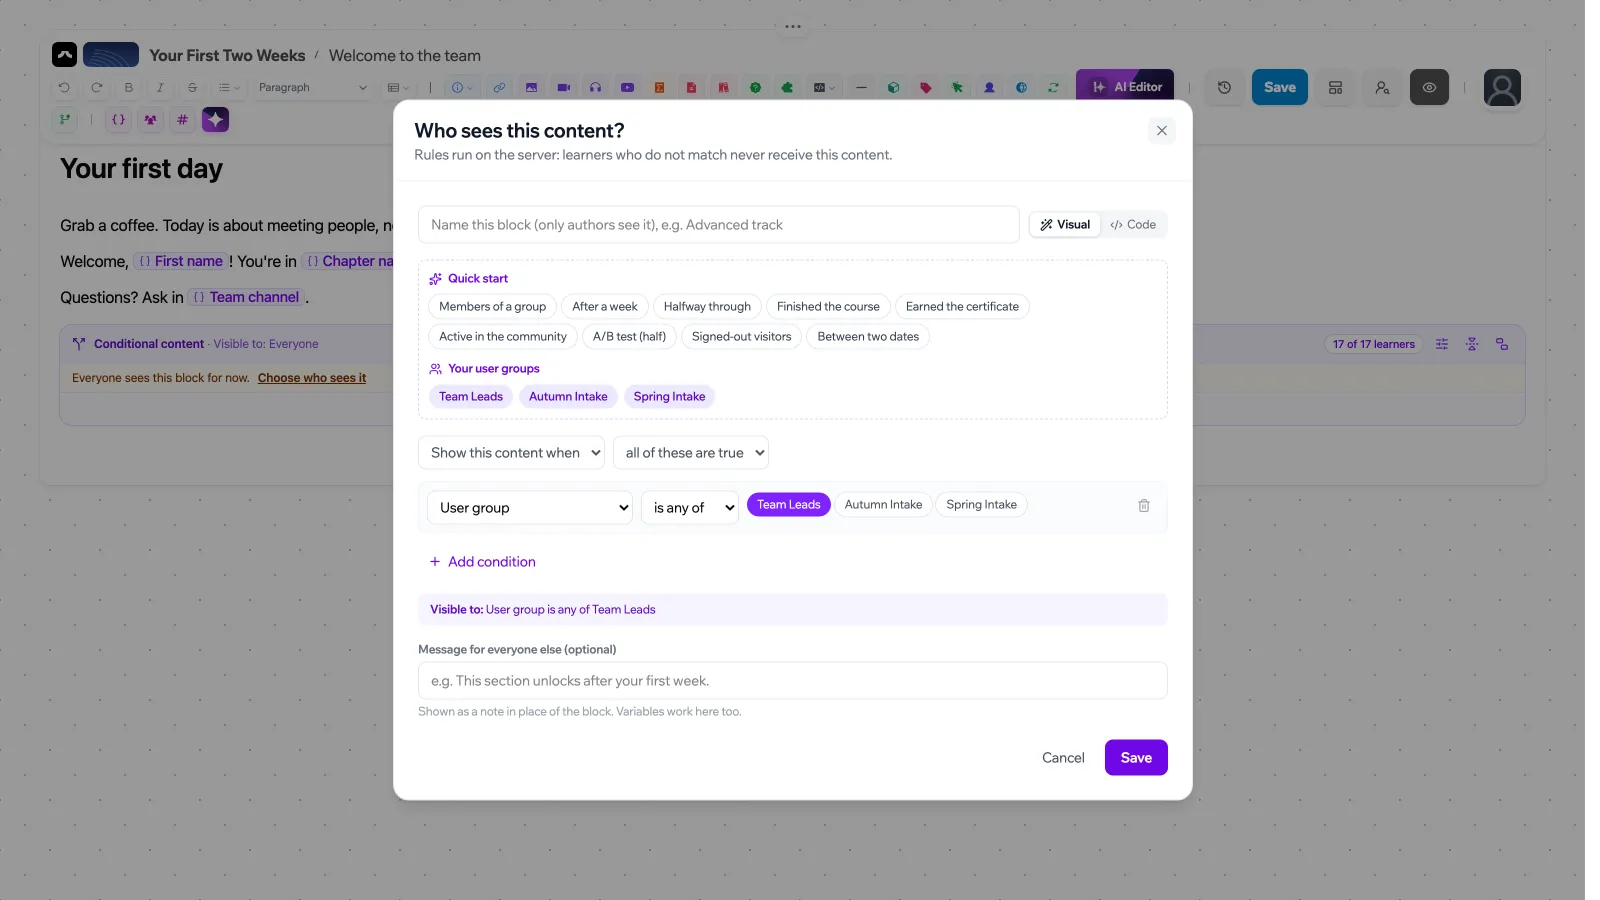
A conditional block wraps blocks that only some learners see. Insert one from Personalize or with /conditional. The Who sees this content? window opens.
Pick who sees it
Start from a Quick start preset, or click one of Your user groups:
| Preset | Who sees the block |
|---|---|
| Members of a group | Learners in the user groups you pick. |
| After a week | Learners 7 days after they enroll. |
| Halfway through | Learners with 50% or more of the course done. |
| Finished the course | Learners who completed the course. |
| Earned the certificate | Learners who earned this course’s certificate. |
| Active in the community | Learners who posted or replied in a community. |
| A/B test (half) | A stable half of learners. Add the opposite block for the other half. |
| Signed-out visitors | People browsing without an account. |
| Between two dates | Everyone, during a time window. |
Adjust the rules
Choose Show this content when or Hide this content when, then all of these are true or any of these is true, and click Add condition. Conditions can use the learner’s user group, role, language, email domain, days since sign-up, enrollment, days since enrollment, course progress, completed activities, completion of the course, the certificate, submitted assignments, average assignment grade, community posts, communities they are active in, and the date.
Switch from Visual to Code to write rules as text, combined with and, or, not and parentheses.
Add a message for everyone else
Optionally, fill in Message for everyone else. It is shown as a note in place of the block, for example “This section unlocks after your first week.” Variables work in it too.
Save
Click Save. You can also name the block (only authors see the name), for example “Advanced track”.
Each conditional block shows who it is visible to and how many of the course’s enrolled learners it reaches (for example 3 of 17 learners). Its header buttons let you Edit rules, Add a block for everyone else (a second block with the opposite rule) or Show to everyone (remove condition).
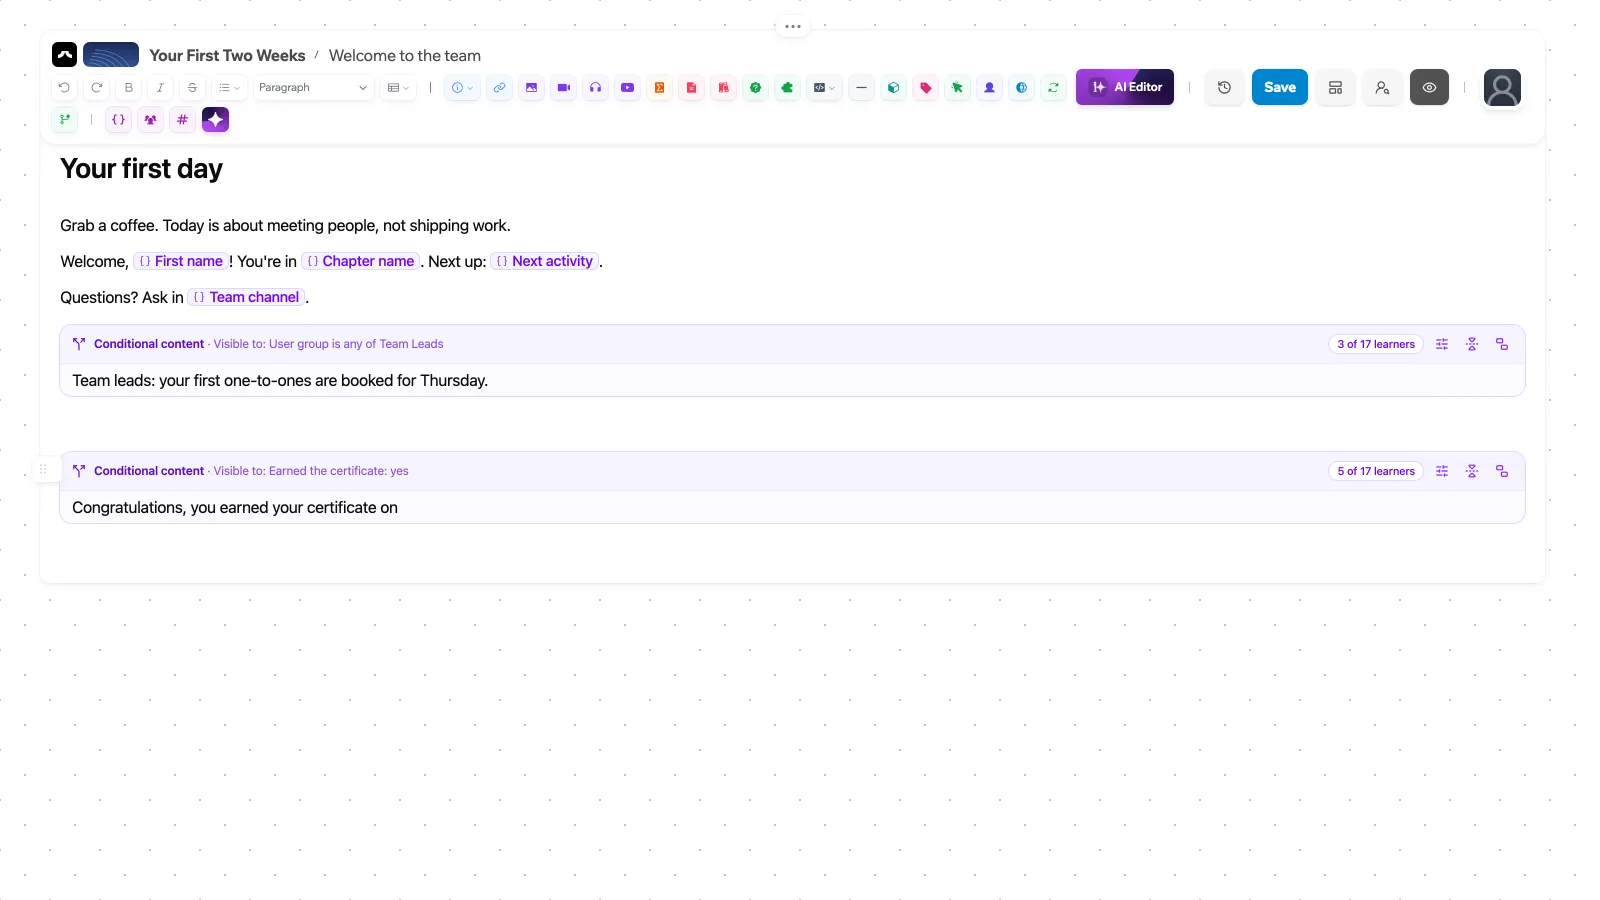
Rules run on the server. A learner who does not match never receives the hidden content or the rules that hide it, so it can’t be found in the page source.
Community tags
Type # in a page (or pick the community option in Personalize) and choose one of your organization’s communities. It becomes a live tag.
When learners hover the tag, they see the community’s latest discussions. They can open a discussion, read the replies and answer without leaving the lesson, or start a new discussion. Signed-out visitors are asked to sign in first.
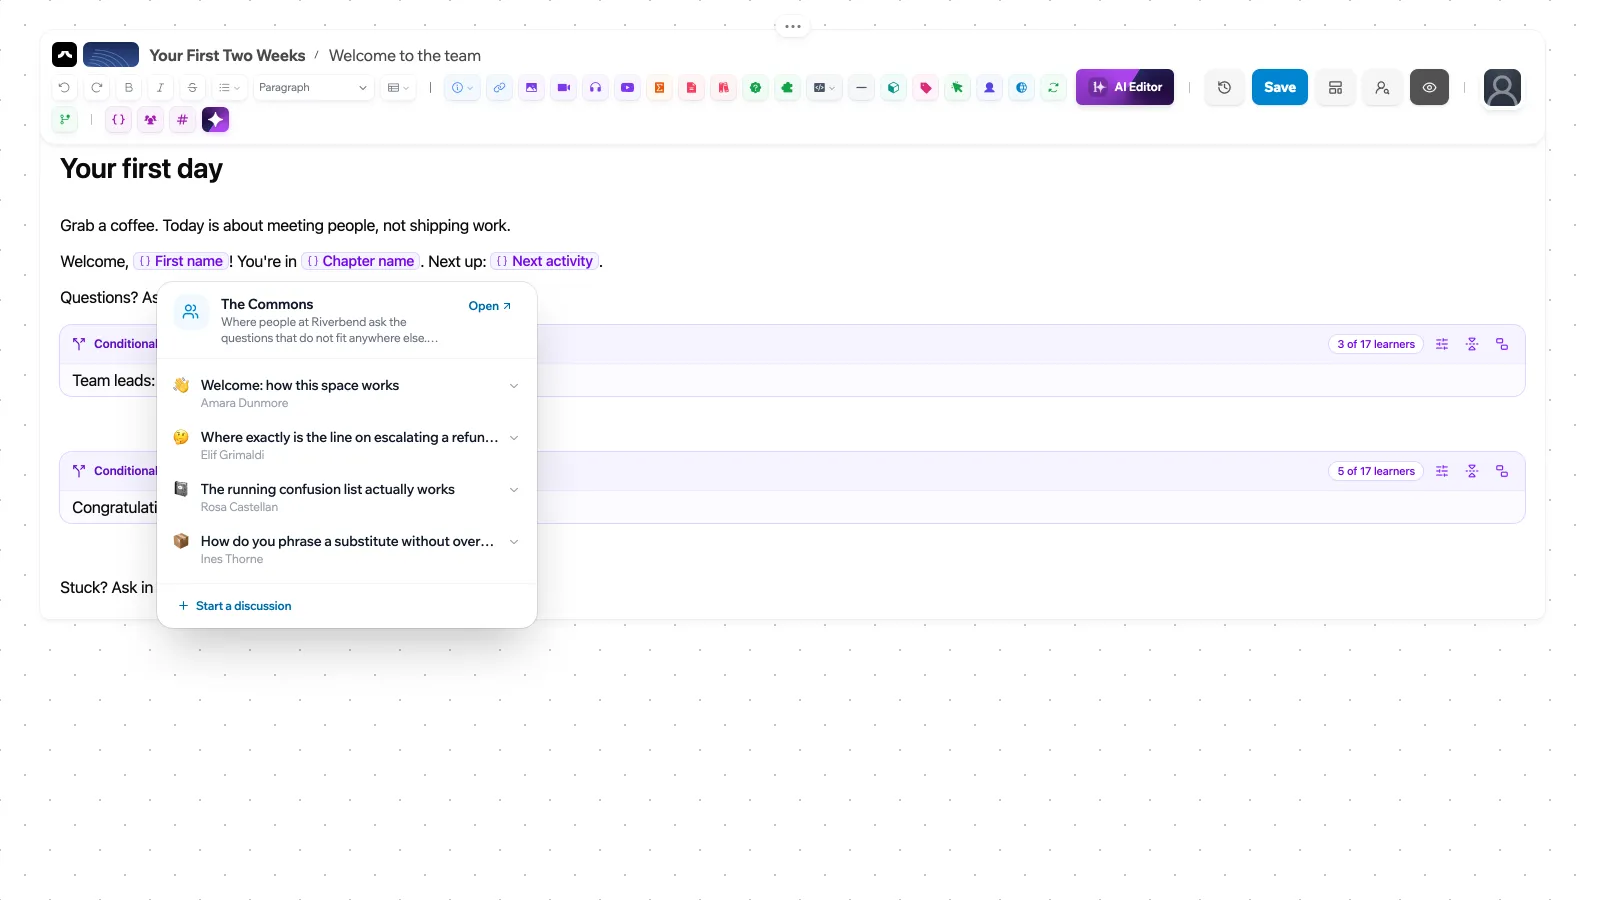
Community tags need communities, which on LearnHouse Cloud need the Standard plan or higher.
Previewing with View as
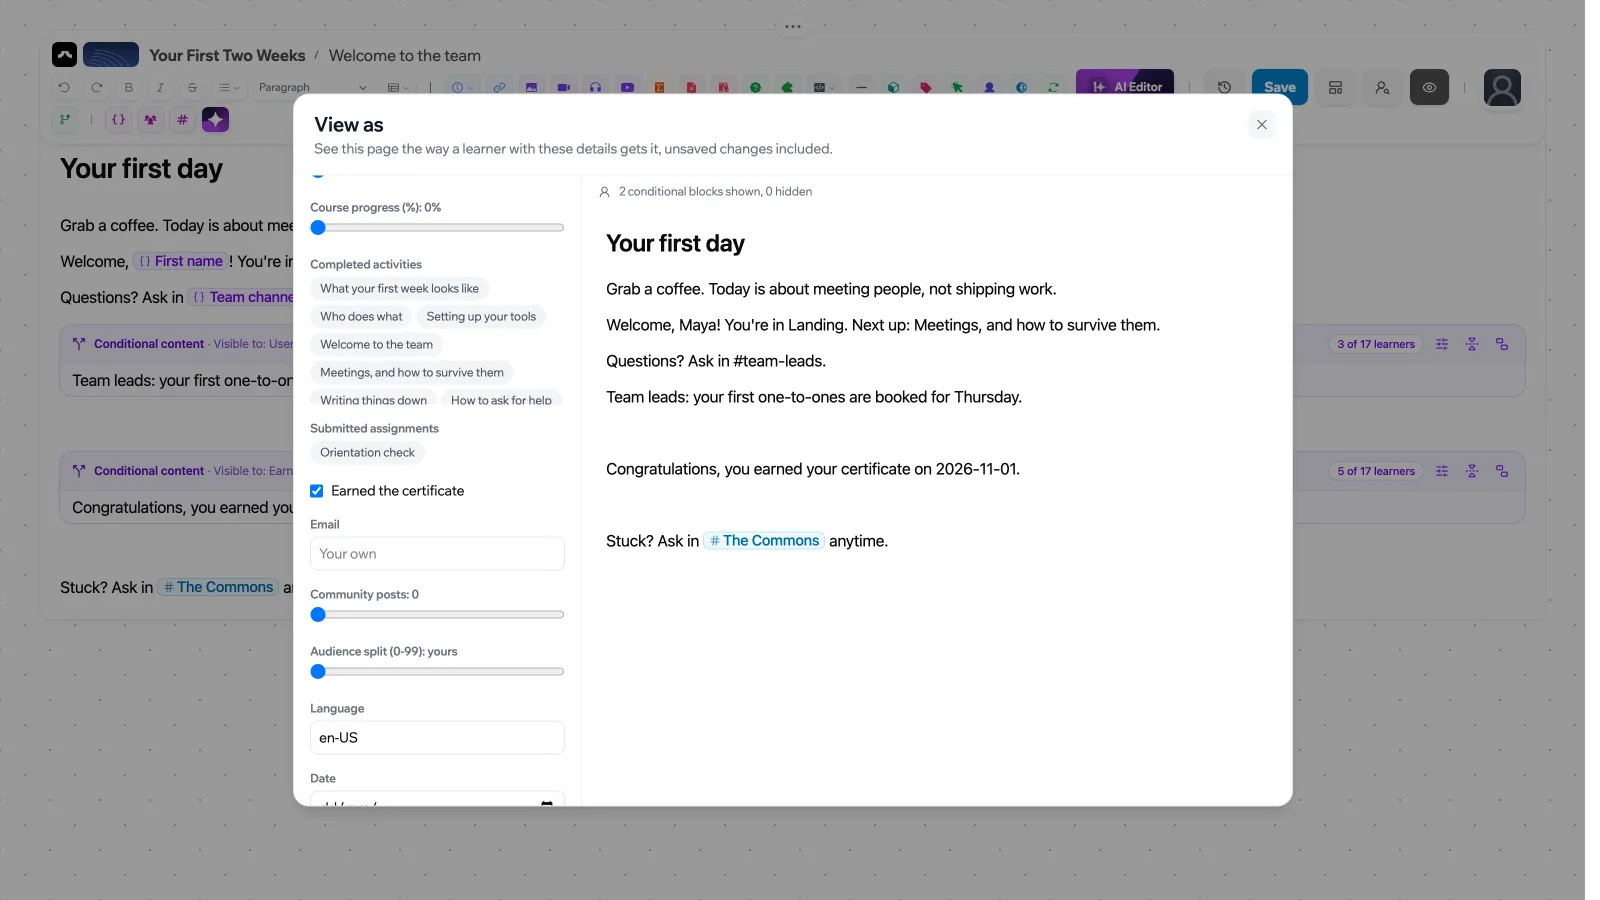
Open the menu next to the preview button in the editor header and click View as. It shows the page the way a learner gets it, unsaved changes included.
- Persona: set the viewer’s role, first name, user groups, enrollment, days since enrollment, progress, completed activities, submitted assignments, certificate, community posts, language and date by hand.
- Real learner: search the course’s enrolled learners and see the page with their real groups, progress and enrollment.
The preview is rendered on the server and shows how many conditional blocks are shown and hidden.
Templates
Templates are blocks or pages that your organization’s authors save and reuse.
Saving a template
- Select the blocks you want to reuse, or nothing to save the whole page.
- Type
/and pick Save as template. - Choose Selected blocks (insert anywhere) or Whole page, enter a Template name and an optional description.
- Click Save template.
Everyone who authors courses in your organization can then use it. To leave blanks that authors fill in when they insert the template, write a field such as {{field.company}} in it.
Inserting a template
Click the Templates button in the editor header, or type / and pick Insert template. Filter by All, Blocks, Pages or Starters, or search by name, then:
- Insert at cursor adds the template where your cursor is.
- Replace page replaces the whole page with a page template.
If the template has fields, you are asked to Fill in this template first.
Starters are ready-made templates that use dynamic content: Personal welcome, Unlock after a week, A/B test, Keep going, Course complete, Certificate earned, Assignment check-in, Join the conversation and Sign-in prompt. Insert one, then edit it freely.
Uploaded images, videos, audio and files stay attached to the activity they were uploaded in. In other activities they may not load, so upload them again there.
A template can be changed or deleted by the person who created it, or by an admin or maintainer.
