User Groups
User groups bundle members together so you can give them access to content in one step. Instead of opening a course to everyone in the organization, you link it to a group, and only that group’s members can reach it.
User groups need the Standard plan or higher on LearnHouse Cloud. They are included on every self-hosted instance.
Creating a group
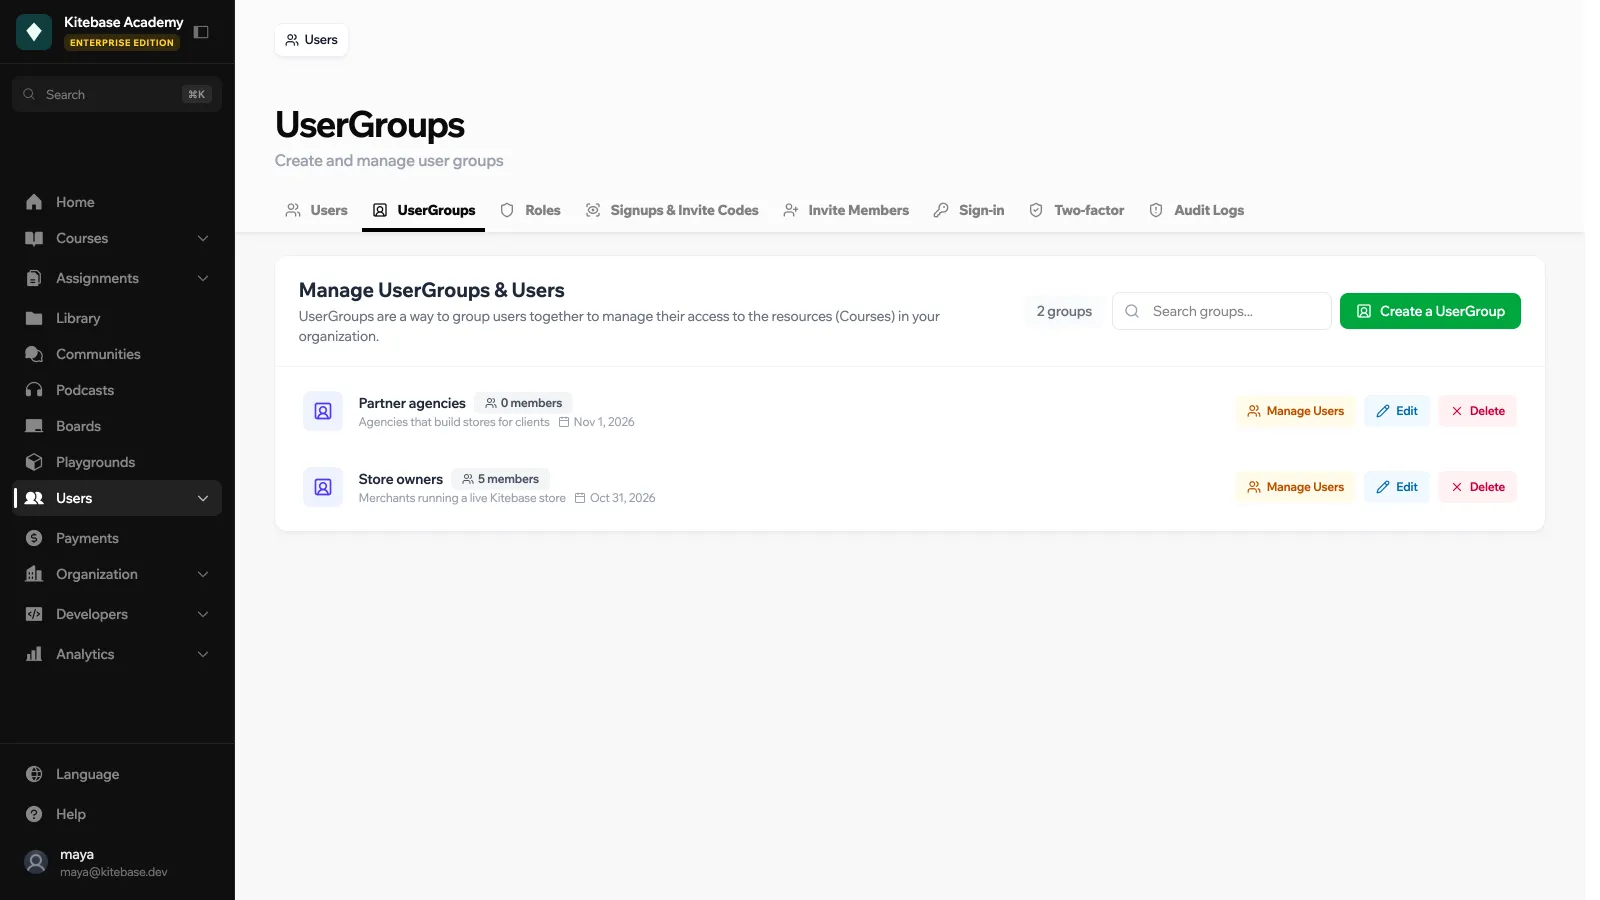
- Go to Users → UserGroups.
- Click Create a UserGroup, enter a Name (required) and a Description.
- Click Manage Users on the group’s row to add members. Filter by All Users, In Group or Not in Group, then Link or Unlink people, or select several and use Add to Group / Remove from Group.
Edit renames a group. Delete removes it, and every member of the group loses the access it granted.
What a group can unlock
You link a group from the resource’s own access settings, not from the Users page. These resources can be linked to a group:
| Resource | Where to link it |
|---|---|
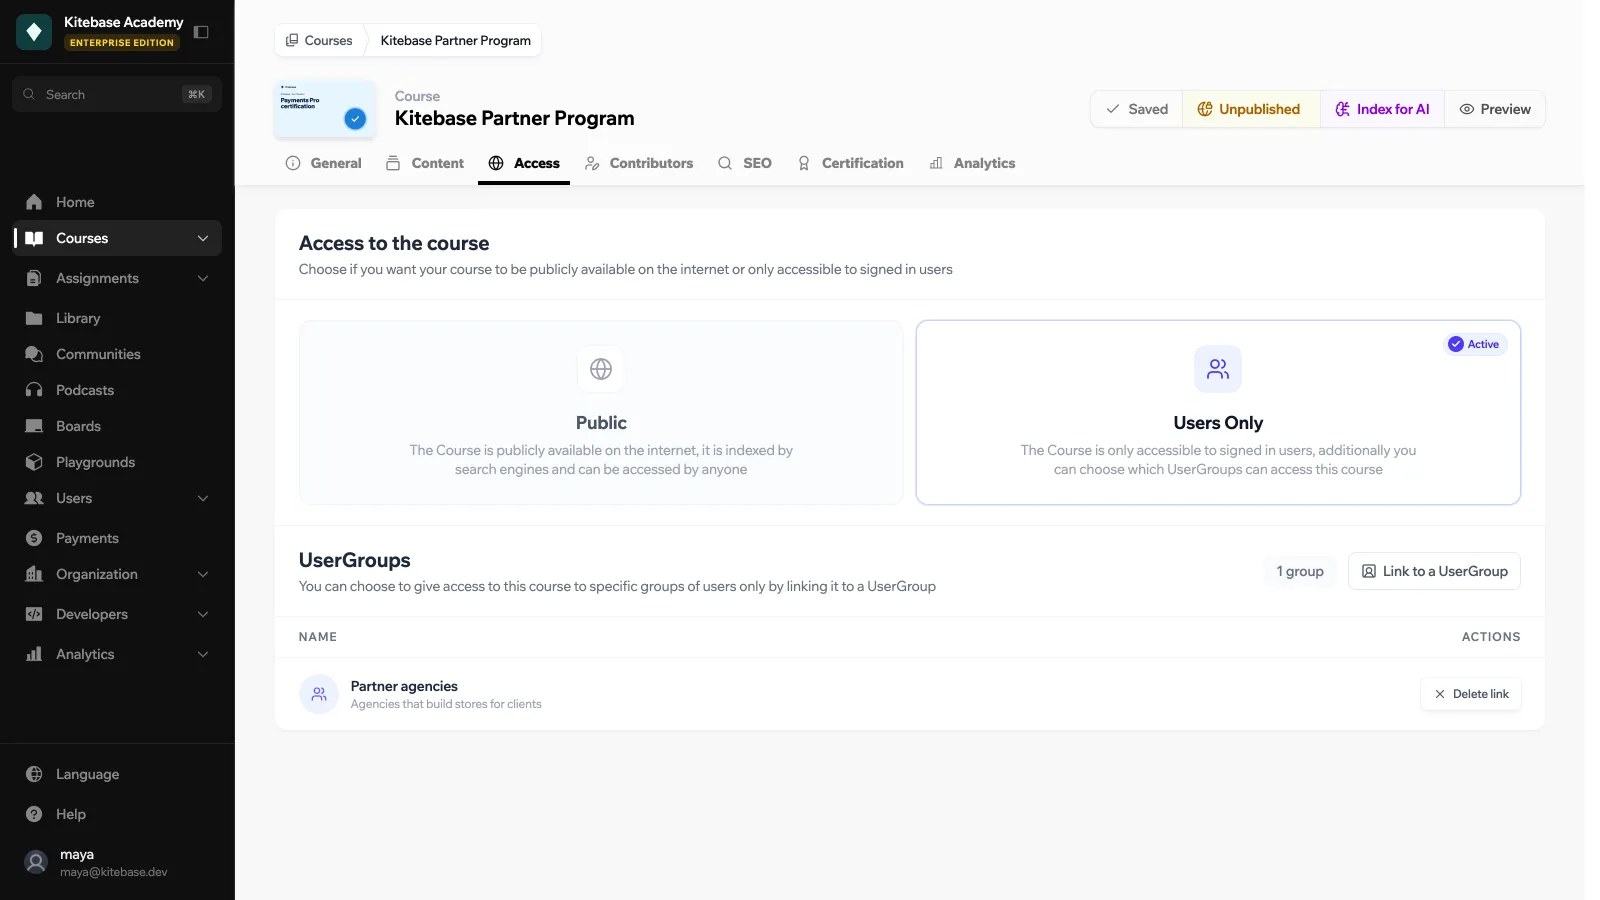
| Courses | The course’s Access tab in the dashboard |
| Communities | The community’s access settings |
| Folders | The folder’s access popover in the Library |
| Boards | The board’s access tab |
| Podcasts | The podcast’s access settings |
Inside a course, chapters and lessons can also be locked to user groups. Locked lessons are hidden from everyone outside the group, including in search.
To limit a course to a group, set Access to the course to Users Only on the course’s Access tab, then click Link to a UserGroup and pick the group. Members outside the group lose access to the course.
Other ways members join a group
- Invite codes can be linked to a group. Everyone who signs up with the code is added to it. See Invite codes.
- Payments: a payment group can be synced to a user group, so buyers are added automatically. See Groups & Bundles.
- API: API tokens with the User Groups permission can manage groups and their members.
